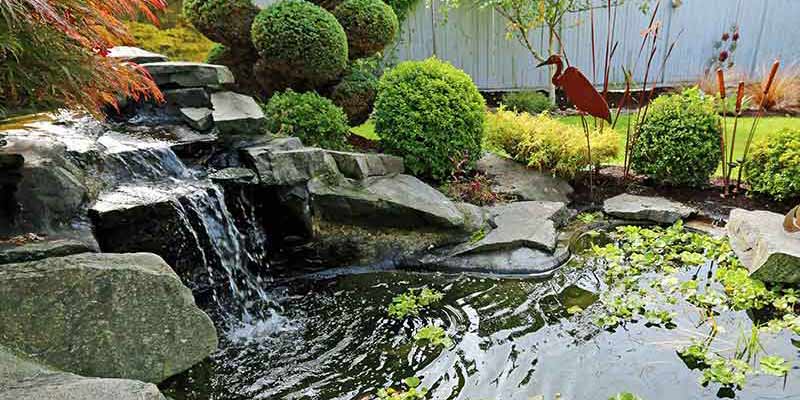
How to Add a Small Pond or Water Feature to Your Yard
There’s something so peaceful about a backyard water feature. Between the gentle rush of flowing water, the sounds of birds playing, and the appeal of lush plants or captivating decorations, a small pond in your yard is like a personal oasis.
While this private paradise may sound out of reach, building your own pond or water feature is easier than you think. With the right materials and a free weekend, you can create a serene environment at home.
In this guide, we’ll walk you through the process of building a small pond or water feature in your yard. However, this isn’t a replacement for professional advice. If you have questions about your property or this process, visit your local garden center or pond supply store for support.
Now, without further ado, let’s dive in.
Step 1: Choose a Location
It may be tempting to plan the perfect water feature and then find a place for it on your property, but it’s best to start with a location and work backward. When you work with the natural features of your yard (rather than against them), you’ll have an easier time with your project. After all, it’s easier to alter your plans than your property.
When looking for the best spot for your water feature, you’ll want to consider:
- The amount of sunlight – If you plan to introduce plants to your pond, they’ll need adequate sunlight to survive. Additionally, if you hope to install a solar-powered water pump to keep costs down, you’ll want to ensure your water feature receives some sun.
- The slope of the ground – Although you can level out a hill to install a water feature, you’ll spend far more time and energy doing so. Choosing a location with flat, level ground will simplify your project.
- The proximity to trees – Leaves, pinecones, and pollen from nearby trees can fall into your pond, clogging pumps and creating a hazardous environment for fish. Placing your water feature away from sources of debris will facilitate maintenance.
Once you find your ideal location, there’s still one step to take before you break ground: Call 811 or visit www.call811.com a few days in advance. The service can help you confirm that no underground gas lines or other utilities run beneath your property.[1]
Step 2: Plan and Design Your Project
Once you have the go-ahead to begin construction, you can start planning your water feature.
Creating a thorough plan now saves you from making multiple trips to the hardware store or committing a costly mistake. Some questions to ask yourself during this stage include:
- How big do you want the feature to be?
- What shape do you envision for it?
- How much do you want to spend?
- Do you want streams and waterfalls? Or a simple pond?
- Will the pond support aquatic life? Or will it be purely decorative?
After answering these questions, you may find it useful to draft a rough sketch of your design.
Step 3: Gather the Necessary Supplies
Your plan should also inform your shopping list. To that end, it’s now time to buy, rent, or otherwise gather all of your equipment. To prepare your chosen location, you’ll need:
- A can of spray paint to mark the outer limits of your pond
- A sturdy shovel to break ground and move materials
- A wheelbarrow to transport the dirt (and more)
For the water feature itself, you’ll require:
- A waterproof pond liner
- Landscaping fabric (optional)
- Landscaping rocks
- A water pump
- Any additional decorations
If you have a pond supply store or garden center near you, you should be able to collect all of these supplies in one trip.
Step 4: Prepare the Site
Now, you can cart your supplies to your chosen location and begin your project in earnest. You’ll want to start by clearing away any leaves, roots, and rocks that could interfere with digging.
With the space free of debris, you can mark the location of your pond.
Use a flexible material like twine or a garden hose to create an outline for your water feature. Then, to mark the perimeter, take your spray paint and trace around the inside of your outline.
Step 5: Dig and Line the Hole
Next, you’ll grab your shovel and start digging. Dig to your desired depth (or the depth recommended to you by 811) and pat the inside of the hole flat, ensuring it’s as level as possible.
From there, you’ll line the bottom of the hole with landscaping fabric, pressing it tightly into every nook and cranny. This step is optional but recommended; the fabric will keep any weeds from puncturing the waterproof pond liner.
Finally, cover the inside of the hole with your pond liner, taking care to push it up against the sides of the hole. The liner keeps the water in your pond from seeping into the surrounding earth. Also, you should allow about ten inches of the liner to spill outside the pond’s boundaries—you’ll cover it later.
Step 6: Install Pumps and Filters
A stagnant pond or water feature will eventually fill with algae, so it’s essential to cycle the water periodically. To do that, you’ll want to install a water pump.
Your pump should be able to circulate the water in your pond every two hours.[2] For example, if your water feature holds 700 gallons, you’ll need a water pump that can handle at least 350 gallons per hour (GPH). To determine the capacity of your pond in gallons, you can use the following equation:[3]
Average length x average width x average depth x 7.48
We recommend using a solar-powered water pump to cycle your water, as you won’t have to worry about access to power, and your electricity bills will stay about the same.
Step 7: Decorate Your Pond
At this point, the hard work is mostly behind you. This step allows you to flex your creative muscles and turn a hole in the ground into a beautiful water feature.
On the outside of the water feature, you can arrange rocks, plants, and flowers to your liking. Consider placing a ring of heavy pond stones or bricks around your water feature, which helps hide the liner while also keeping it from slipping down.
Inside the pond, you might add:
- Gravel
- Plants
- Lily pads
- Statues
- Figurines
Some water pumps also come with fountain attachments, allowing you to add visual interest to your water feature.
Step 8: Add the Water
At long last, it’s time to fill your water feature. Simply pull the garden hose out to your pond, turn on the tap, and wait. Depending on the size of your pond, this step may take a few hours; you can leave the hose in the water and check in every 30 minutes or so.
If you plan to introduce fish to your pond, let the water sit for 72 hours. This waiting period allows the water to settle and gives the aquatic ecosystem time to develop.
From here, all you have to do is keep up with maintenance and enjoy!
Solariver: Your Partner in Ponds and Water Features
Adding a small pond to your yard may take a few days, but it’s well worth the effort. When it’s done, you’ll be able to kick back and appreciate the calming effects of a babbling brook.
If you want your pond or water feature to stay beautiful, you’ll need to keep the water circulating. For that, look no further than our collection of solar-powered water pumps.
Pumps keep your water clean and your fish happy. At Solariver, we offer various sizes of pumps with different features to suit every situation. If you need help choosing the right pump, take our quiz or contact us—we’d love to hear about your project!
